Jaquees [the Hamster]

Session 1

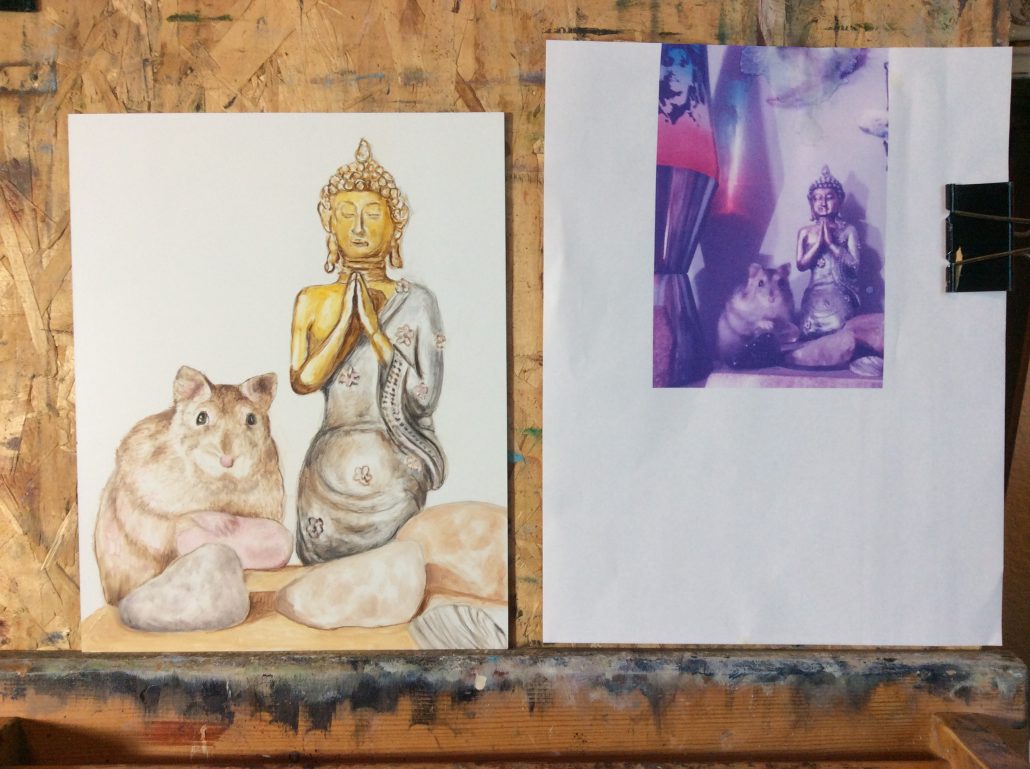
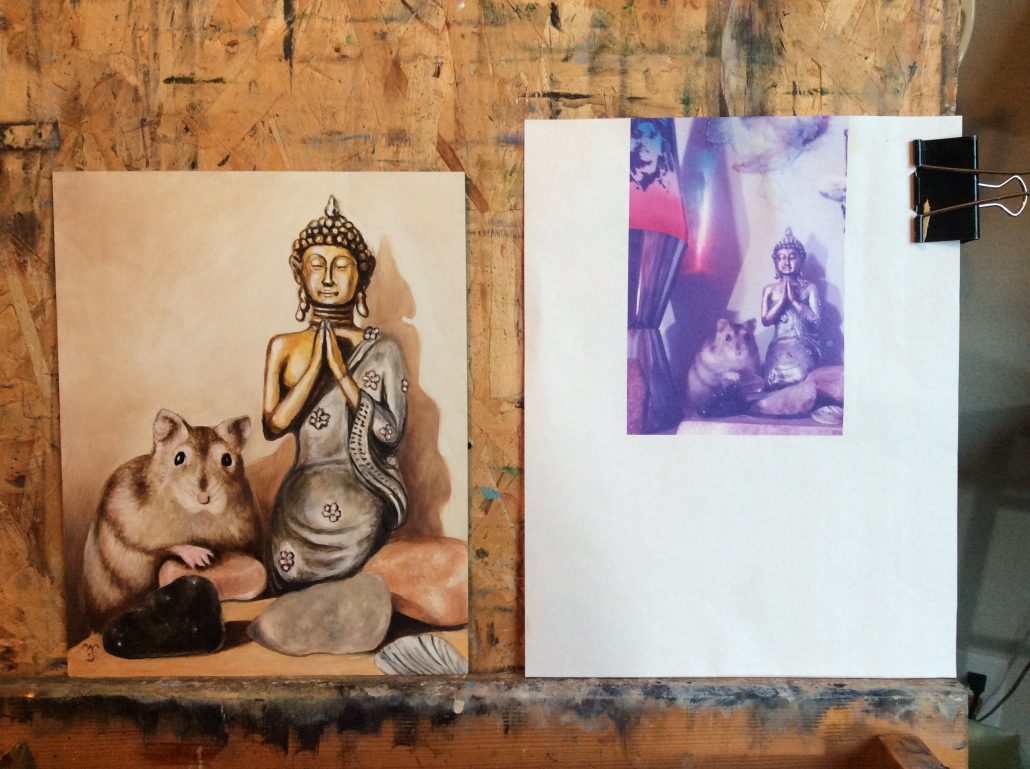
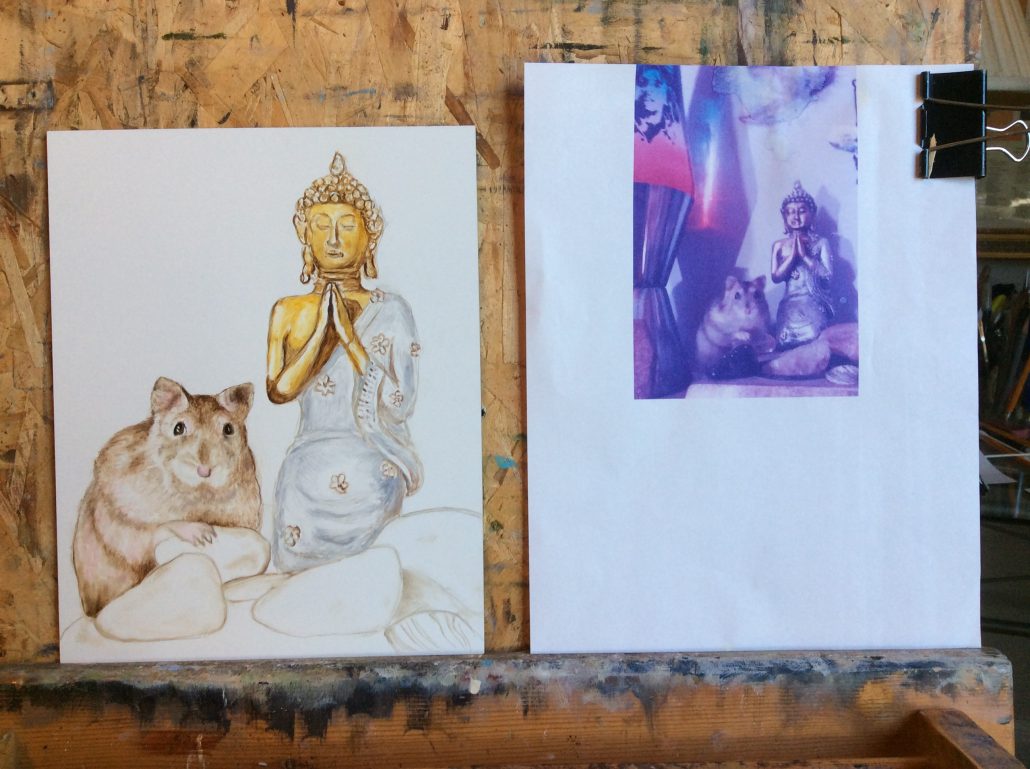
After making several copies of the selected photo I used the best size to fit an 8 x 10” size panel. I began by carefully drawing outlines of the hamster and figurine in light pencil. Next I mixed raw umber with a little light gray for the hamster and painted over the pencil drawing focusing on the outline and identifying the darkest areas first. I blended the lines with a soft bristle brush to soften the edges. After I developed the form to my satisfaction I leave it to dry as it will serve as my schematic to work from in future sessions. Using a medium gray I paint over my pencil line drawing of the figurine and small rocks. I will let this dry as well before proceeding. I have found that letting the painting dry does take an element of patience but feel it is worth it in order to retain the form achieved so far. In the past, I have sacrificed form when working on a painting before the previous session has dried. Although the original photo included what looks like a lava lamp, I leave it out of the painting as well as it’s shadow, so I don’t over complicate the composition. This is the end of session 1.

Session 2

I began this session by slightly defining the hamster’s features with a little burnt umber. Focusing on the darkest areas I blend the edges establishing where the darkest tones will be. I used thinned burnt umber to help add middle tones to the hamsters form. I darkened the eyes with ivory black and burnt umber and added a small highlight in the eyes which will be the spot I will add the final highlight later.

Looking closely at the figurine I noticed that the upper torso is a brass/bronze color whereas the garment is silver/gray. I mixed cadmium yellow medium with some burnt umber and added a little white to make the brass color. I added a preliminary layer of color with darker burnt umber accents to help create form.

On the garment I mixed gray with white and scrubbed in enough color to establish a basic form. This will all be left to dry before I proceed. This is the end of session 2.

Session 3

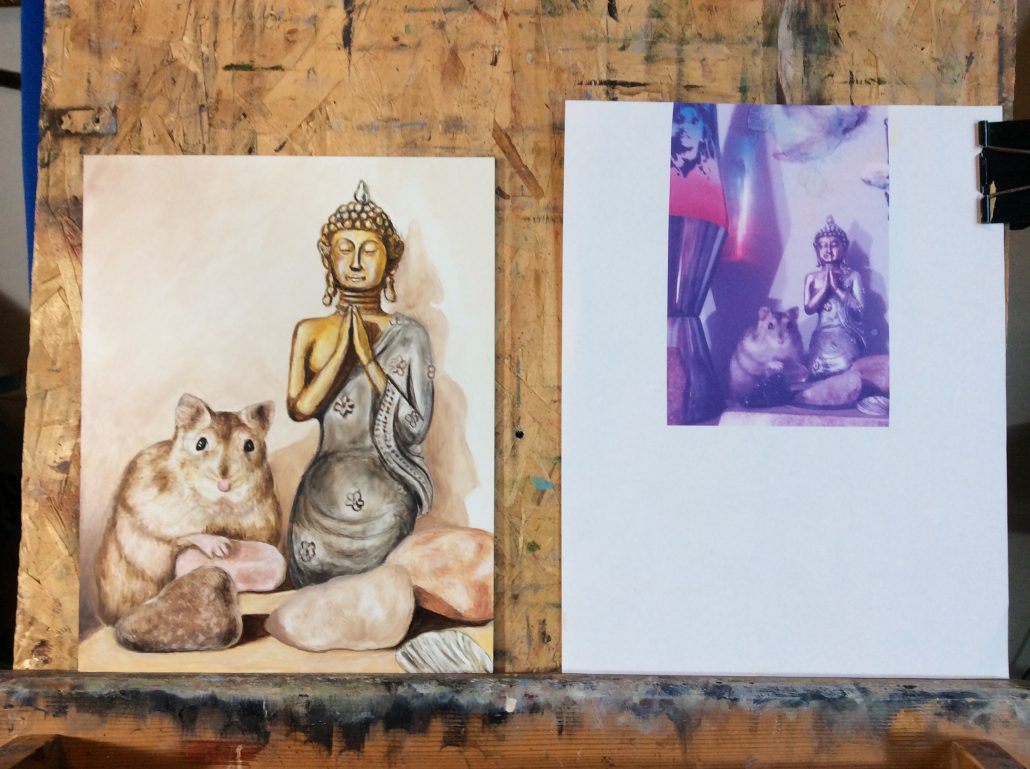
My goal in this session was to rough in the rocks, seashell, and tabletop. Except for the background which I will handle in the next session, all objects in the painting have been filled in with “dead color”. My studies of “old masters” techniques revealed that they would apply a preliminary color, “dead color”, whose purpose was to establish a basic shape and color tone for each object in the painting. Once dry, it is then easier to establish shape by adding the darker areas, middle tones, and highlights.

I looked at the reference photo to see if I could find shadows. Although subtle, I attempted to indicate shadows with slightly darker tones. I feel that shadows are an artist’s friend when attempting to develop form and perspective. I always establish shadows early in any painting as they help me get a better final result. This is the end of session 3.

Session 4

After allowing the painting to dry, I focused on adding dark and middle tones to the statue and the hamster. I added background color made up of a little burnt umber added to white. For the cast shadows I darkened the background color somewhat. Typically shadows should be thin and transparent so that was my goal in this session. Since I paint in thin layers it doesn’t take the painting long to dry. In the next session I will give attention to the rocks and tabletop. This is the end of session 4.

Session 5

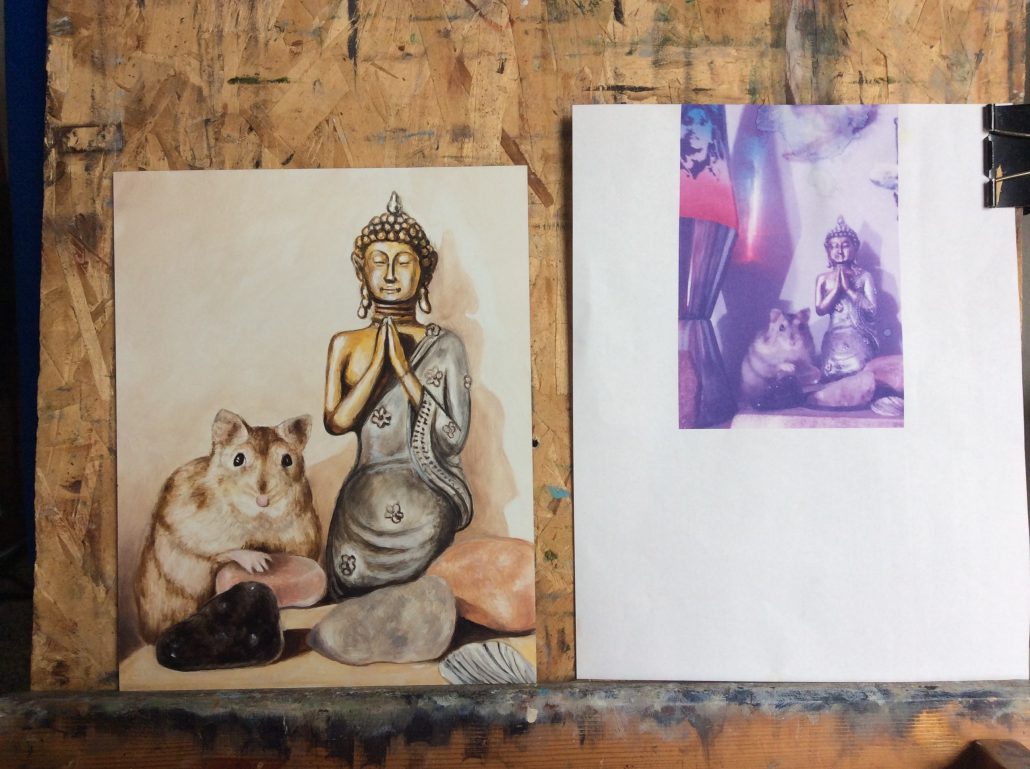
This session was devoted to developing the rocks and tabletop. I used thin washes of Venetian Red, Burnt Sienna, light gray, and dark gray for the different stones with the intent of establishing basic form. I also enhanced the cast shadows to the right of the stones. Another object that needed developing was the sea shell……. I used a little ivory black mixed with white to create its form.

It is now apparent that the light source is on the left. It is always important in any realistic painting to remember where the light is coming from since that determines where the highlights and shadows should be placed. Lastly, I used a little yellow ochre with gray and white added for the tabletop. As with all previous sessions, I will allow this session to completely dry before proceeding. So far In this painting I have not used any painting medium but have only mixed a little turpentine to thin the oil paints. For that reason each session has been able to dry within about 24 hours. This is the end of session 5.

Session 6

I spent most of this session working the stones and sea shell. The smallest stone was painted with Venetian red mixed with gray and a little white; the darkest stone in the left foreground was painted with ivory black with some cobalt violet and a touch of gray in spots to identify future highlights; the stone on the far right I used burnt sienna thinned with gray and lighter gray for the highlights; the middle stone was painted with various tones of gray and the sea shell with ivory black and white. I also added some of the darkest tones to the figure as well as white highlights to the torso as well as the silver garment. Where most of my paint layers are thin as I build form and tone, white is the only color I add virtually right out of the tube with an impasto application for appropriate highlights.

The painting has now reached the point where I carefully scrutinize it looking for areas that can be improved. I critique the painting comparing to the reference photo for any items that need to be fixed either in color or form. In the next session I will work on the background and tabletop. This is the end of session 6.

Session 7

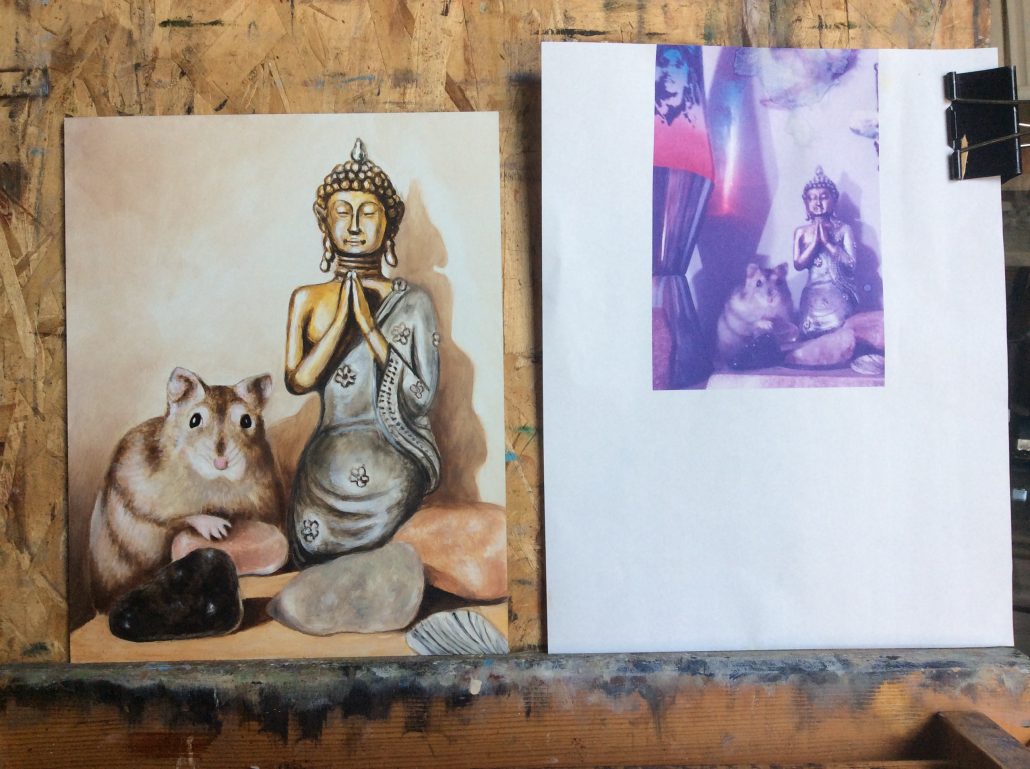
The purpose of this session was to work the background including the cast shadows. With a little burnt umber, gray, and white I mixed a middle tone to develop the shadow to the right of the figurine. Using a little darker tone I painted the shadow in between Jaquees and the statue. I also darkened the area to the lower left of the hamster by adding more burnt umber to the same mixture. I added a neutral tone of the same mixture to the upper left area of the background. Next, I added some darker tones to the hamster as well as highlights. Finally, I added a thin glaze of burnt sienna to the tabletop.

The painting has now reached the stage where I carefully critique it with a view to making any changes I feel necessary. After it dries I will have one last session to accomplish those changes before letting it completely dry for varnishing. This is the end of session 7.

Session 8

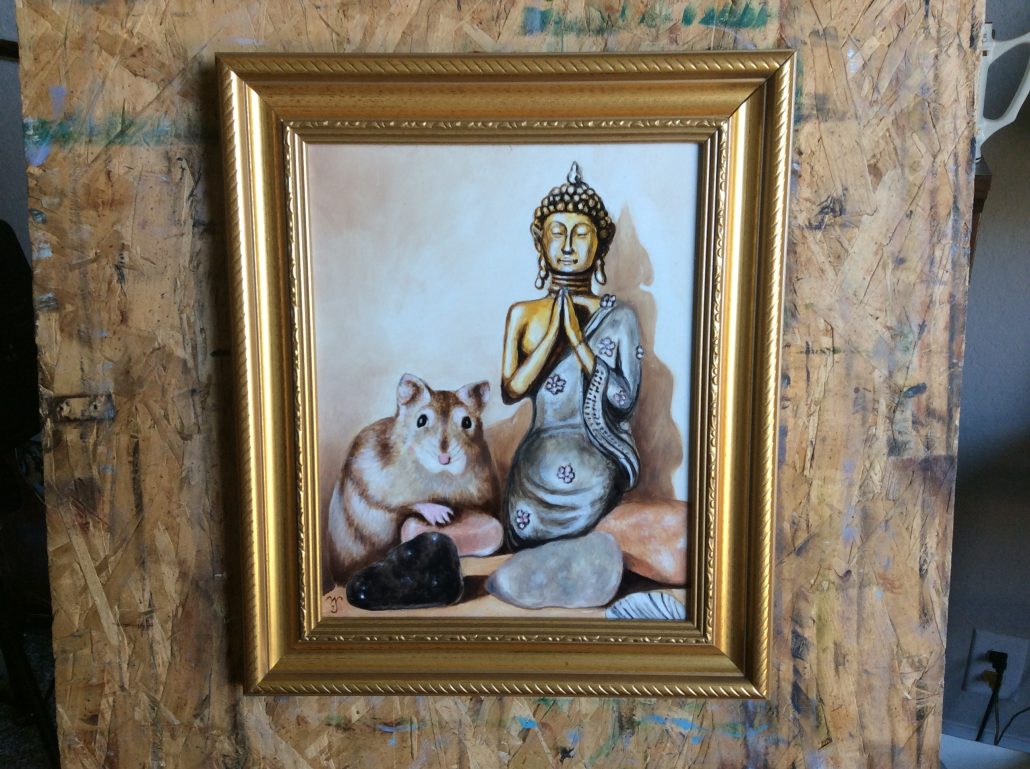
This session involved making minor changes that I noticed after scrutinizing it after session 7. I darkened shadows in places and added highlights in the figurine, the hamster, the rocks, and the sea shell. Unless I notice anything else as it dries, the next step will be a layer or two of varnish that will bring out the colors and protect the surface. I signed the painting by adding my initials WTS to the lower left corner. This is the end of session 8.

Session 9

This session was devoted to critiquing the painting for some last minute changes.

Once the small touch ups were dry I proceeded to add a layer of artist’s Dammar varnish which will bring out the colors and protect the surface. For example, this painting has a lot of burnt umber, a color that dries to a matte finish. When varnish is applied to the dry surface it enhances the color’s brilliance and adds a sheen to the surface. The Old Masters would varnish their paintings for these same reasons. In time dust may cling to the surface so it will be good from time to time to wipe the painting with a dry, lint free, cloth to keep dust build up to a minimum. This is the end of session 9 and this art project.

© William T. Smith, when applicable. All of the original artwork as it appears on this website is the hand-painted work of William T. Smith. Any original artwork was used for reference only and is not intended for commercial use or mechanical reproduction. Some original painting descriptions include text content from Wikipedia.org.
This website was designed by Jonathan Smith. If you're interested in a website please visit smith-digital.com for details. - Enfold WordPress Theme by Kriesi